Menu

Radar

 
Radar

Operation

 
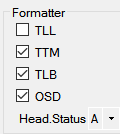
After clicking the "Start" button the Radar simulation will start, and NMEA sentences will be sent to the selected output port of the PC, until the "Stop" button is pressed. Note that only those NMEA sentences will be sent that are checked in the "NMEA sentences" panel.
 
All sentences are shown in the I/O Port Monitor as they are output. When logging is ON (toolbar option), the sentences will also be written to the user selected log file.
 
Clicking the "Stop" button will suspend the operation, until "Start" is clicked again.
 
When the Transmit Interval is set to 0.0 the sentences are output as "single shot" each time you click the "Start" button.
 
Clicking the little X top-right will exit the object and save optionally all current values, so that next time the instrument is used it can continue where it stopped. Note: saving is an optional setting in the General Settings.
 
A short description of each field follows.
 
1

Target number

1. Target number
The number for this radar target (0-99)
 
2

Target name

2. Target name
Name of radar target
3

Target Label

3. Target Label
Global target Label.
This is the text that will be sent in the TLB sentence.
Only one target label per TLB sentence, multiple labels in one TLB sentence is not supported.
This field is enabled when the TLB formatter check box is checked.
4

Target position

4. Target position
Position of the radar target.
 
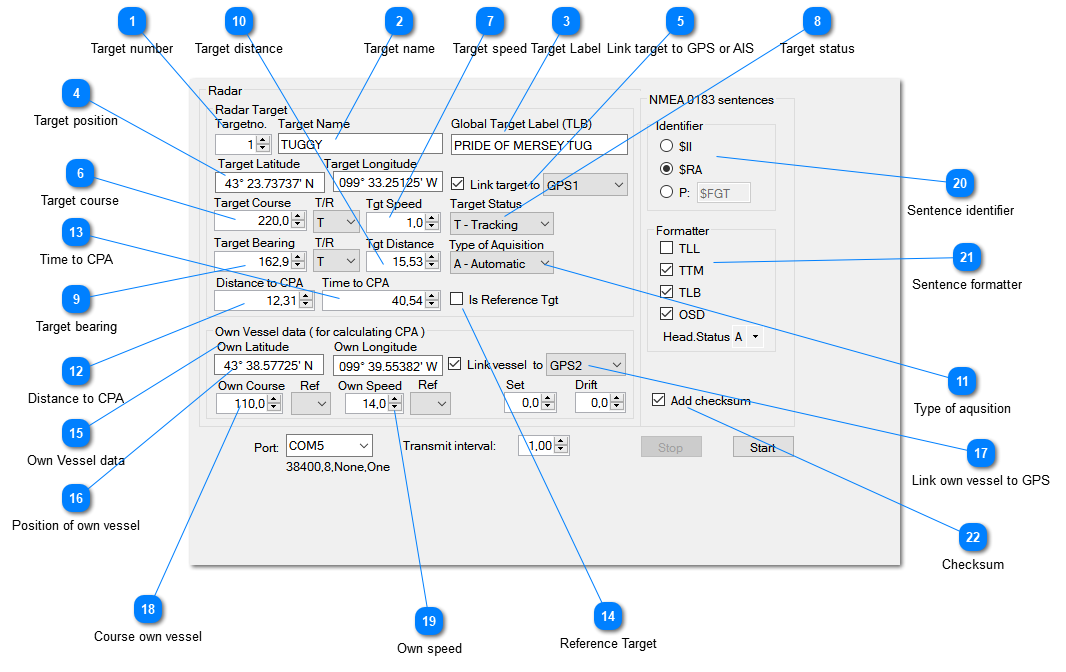
Based on course and speed, taken from the value of the controls in the Object Control Center, the position of the Radar Target is automatically updated every n second, whereas n is the interval set by the user.
5

Link target to GPS or AIS

5. Link target to GPS or AIS
 
Target position, Course and speed can optionally be taken from a selected active GPS instrument or Class A/B AIS target. When the checkbox is checked a dropdown control will open, showing all available active GPS instruments and AIS targets.
 
Select the object required and the navigation data will be taken from the linked GPS instrument or AIS target. When an AIS target is linked, the AIS target in turn can also be linked to a GPS. This can be very convenient when this GPS is set up to sailing an automatic route.
6

Target course

6. Target course
The course of the target, select True or Relative with the adjacent dropdown.
Can be set manually with the up/down controls or taken from a linked GPS or AIS target.
7

Target speed

7. Target speed
Speed of target.
Can be set manually with the up/down controls or taken from a linked GPS or AIS target.
 
8

Target status

8. Target status
Target status, select:
  • T - Tracking
  • Q - Query
  • L - Lost
 
 
9

Target bearing

9. Target bearing
Bearing to this radar target calculated from the position of the own vessel.
10

Target distance

10. Target distance
Distance to this radar target calculated from the position of the own vessel.
11

Type of aqusition

11. Type of aqusition
Type of aquisition. Select Automatic or Manual.
12

Distance to CPA

12. Distance to CPA
The distance to the Closest Point of Approach.
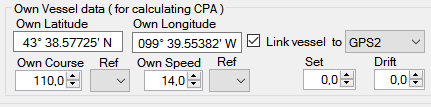
The CPA distance is dynamically calculated from the position, course and speed of the "Own Vessel" to the position, course and speed of the Radar Target.
13

Time to CPA

13. Time to CPA
The time to the Closest Point of Approach.
The CPA time is dynamically calculated from the position, course and speed of the "Own Vessel" to the position, course and speed of the Radar Target. A negative value in the Time to CPA means that the target is moving away from the CPA.
14

Reference Target

14. Reference Target
Check when this radar target is a reference target.
15

Own Vessel data

15. Own Vessel data
In order to have a CPA (Closest Point of Approach) calculated in the Radar object, the "Own Vessel" concept is introduced.
The CPA is dynamically calculated from the position, course and speed of the "Own Vessel" to the position, course and speed of the Radar Target.
Remember, the "Own Vessel" can be linked to a GPS or AIS target and can in this way sail it’s own automatic GPS course.  
16

Position of own vessel

16. Position of own vessel
The position of the "Own Vessel".
17

Link own vessel to GPS

17. Link own vessel to GPS
Vessel position, Course and speed can optionally be taken from a selected active GPS instrument. When the checkbox is checked a dropdown control will open, showing all available active GPS instruments.
 
Select the GPS required and the navigation data will be taken from the linked GPS instrument. This can be very convenient when this GPS is set up to sailing an automatic route.
18

Course own vessel

18. Course own vessel
Course of own vessel.
Can be set manually with the up/down controls or taken from a linked GPS.
19

Own speed

19. Own speed
Speed own vessel.
Can be set manually with the up/down controls or taken from a linked GPS.
20

Sentence identifier

20. Sentence identifier
To set the NMEA0183 sentence identifier. Set this to either
 
  • $II - Integrated Instrument
  • Native - $RA, radar
  • Proprietary - create your own in the text box
21

Sentence formatter

21. Sentence formatter
Select the NMEA 0183 sentences you want to simulate and to be sent to the output port
22

Checksum

22. Checksum
Check this if you want a checksum added to each sentence